2026-01 Snö and New Heating-Room Floor
Snowfall
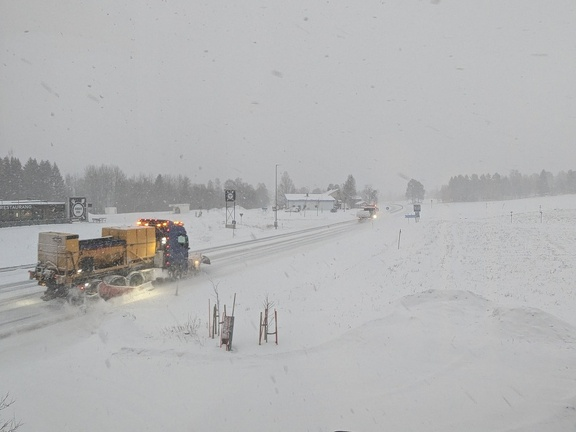
This month all the overdue snow came. I dug out pathways from the front door to the garage and to the bridge, but then the wind would pickup and more snow would come. There were great big snowdrifts burying the pathways. The deepest snow was down the bottom of the garden, where it was chest deep during week 3. The driveway was cleared by a big snowmover into a big pile and for a while we had a snow pile as high as the garage. Later the sun came out for a week, temperatures went to just above zero, and the snow levels melted down a bit.
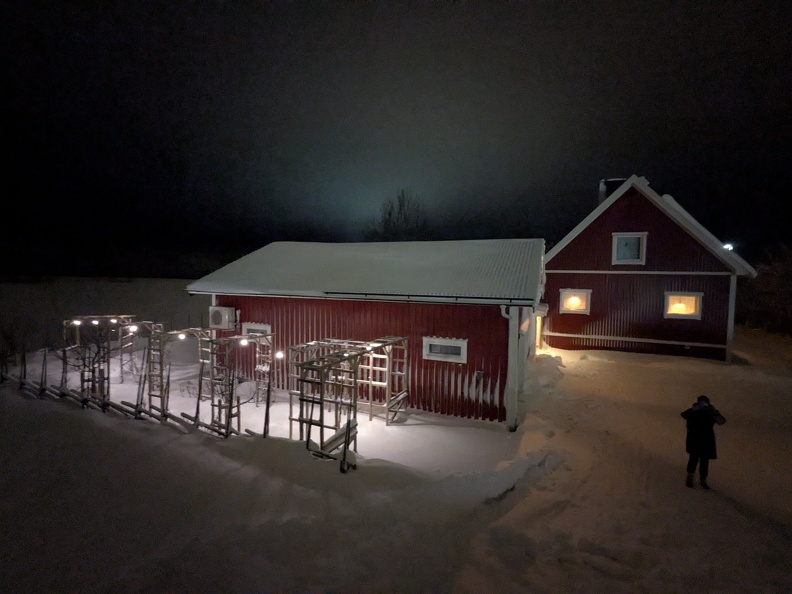
This doesn’t look like much snow, but the photo is taken from on top of the snow pile cleared from the driveway
For the new year we had visited Stockholm for a few days, which is a separate post. After the holiday I had to go back to work. But in the evenings and weekends I wanted to progress a project in the basement which was to renovate the old heating-room. It’s a room that used to house an old oil burner and perhaps the hardest room in the house to renovate. But I want to turn it into something hygienic and usable, but keeping with the house character.
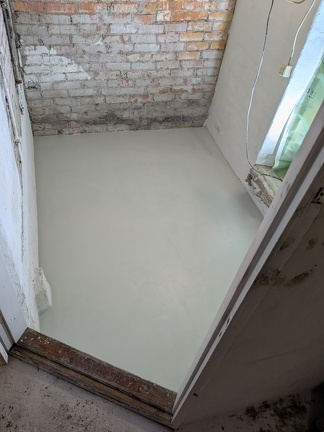
Heating-Room Floor Levelling
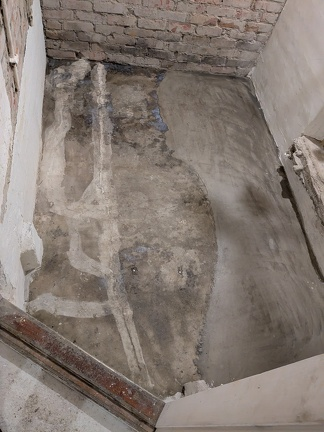
Last month I had uncovered the original concrete floor.
I wanted to level the floor and create a consistent surface which would help for any future floor covering. I used an angle grinder on the cracks and then used a hard repair cement (Husfix) to fill and seal the cracks. I’d already done a smaller self-levelling pour last month to fill in the lowest areas of this floor. I did this earlier pour because the self-levelling concrete has limits on how thick a layer can be in a single pour, otherwise there is a risk of cracks as it sets. To prepare the current surface for a new layer, I used a sticky primer that the self-levelling concrete provider says to use.
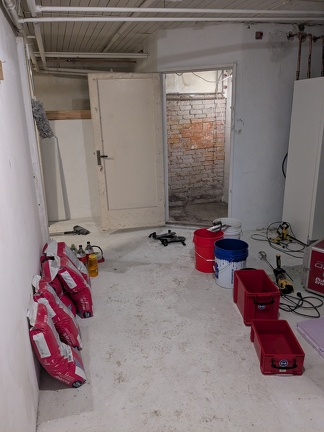
Preparing for the Pour
I was able to get 6 bags delivered of self-levelling floor compound (Topplan DF), which I calculated would be slightly more than I needed, which is fine. The compound stops being free-flowing within maybe only 15 minutes, which makes pouring 6 bags a challenge if I want to avoid bumps and ripples in the surface.
I was also up against a time limit as the asbestos-removal workmen needed to be able to get into this room to work on the ceiling in 2-3 days time, and I only had my evenings after work to get things done.
So I created a staging area for the pour. I prepared the exact amount of water needed for each bag in advance, and spare buckets for mixing in. I also staged out the mixing drill and protective equipment – a facemask is important as the cement in the bags sets in contact with water, which includes the on damp surface of your lungs. I also adjusted the spiked shoes that allow a person to walk through the wet concrete to work the surface without leaving marks. Last time I used levelling compound in a different project, the shoe straps had hung down into the compound and caused big marks that complicated things during a time limited operation. So I adjusted them to fit my shoes properly and cut the straps short.
Lastly I gave a local friend a call and asked if he had 30-40 minutes, partly because I thought I would need the help and partly because I thought he might be interested to see the pour taking place. Despite the short notice he made time to come over and help, which I really appreciated.
Pour and Hope
We checked everything and then set to work with an urgency to get all 6 bags mixed and poured at once. We mixed three buckets, one after the other as I only had one heavy-duty mixer. I poured the first buckets in the far corner area and was happy to see the compound flow tightly into the room corners with minimum fuss.
I had one panic when I realised I’d prepared 5 lots of water not 6 – I don’t know how I missed something that obvious. But I got the water promptly and we mixed up the next three bags. With the floor surface covered I put the last remains in the middle of the room.
You are supposed to trowel the surface to help the wet compound level, but my previous experience as an beginner was that I’m more likely to create solid ripples in the thicker sediment if I play with it too much. So I gently trowelled where different buckets of the overall pour had met and then climbed out to let the surface find its own level and to begin reacting and solidifying.
I watched the surface for a bit, with air bubbles coming to the surface and popping, but it would be hours before it properly set so I forced myself to stop watching and come back in the morning.
After the Pour
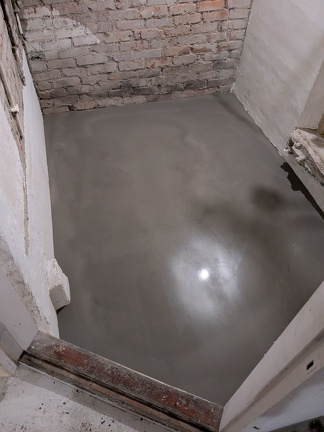
In the morning after the pour I found one small hole had appeared near the far wall where my sealing of the floor cracks had been imperfect and some compound had disappeared into the crack, leaving a pit in the surface. I used some hard repair concrete with a metal trowel to fill and level that area.
I vacuumed the surface, and then poured about a litre or two of water over the new layer to make sure there was enough moisture present for the concrete to keep setting over time. Concrete doesn’t dry out as it sets (e.g. its not evaporation), it’s instead converting the water as part of its reaction. So putting water onto the newly-setting hard surface is beneficial. Especially as I wanted to seal the layer next.
After 24 hours I then used some leftover water based floor paint (Teknos Teknofloor Aqua) to create a surface that would seal in the dust and protect the floor from work taking place in the room. It didn’t have to be perfect as this floor should eventually be covered by a hard laminate. I also didn’t want the fumes and higher complexity of an epoxy paint. I like the ease of use of the water-based paints.
Asbestos Removal
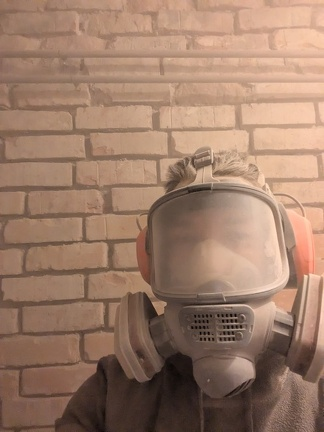
The asbestos removal guys arrived the next day. I had everything cleared from the surrounding area so that they had space to operate. I showed them down to the room and they seemed happy to get started. Somehow I doubt this will have been the worst basement they have had to work in. I left them alone but could hear their air cleaner running and, from the sound of the motor, I suspect it was the same model I have for the workshop. I did sneak a photo at lunchtime of the operation in progress, because it was exciting, but I didn’t go near the room.
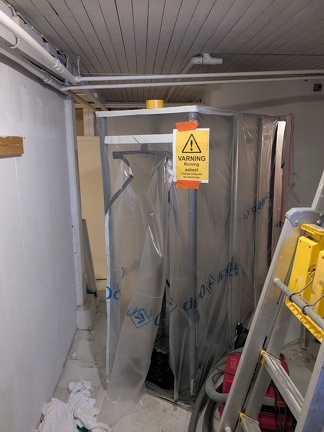
Eventually they left. They took the gypsum boards that had been covering the asbestos sheets, and took the asbestos sheets themselves. All in double-sealed plastic bags. I asked about ongoing risk and recommendations. They explained they had cleaned down all the surfaces and left the air filter running for a length of time they calculated should remove any meaningful risk of ongoing exposure. As “belts and braces” I’ve left my own air filter running in the room since, especially with all the dust from subsequent building work.
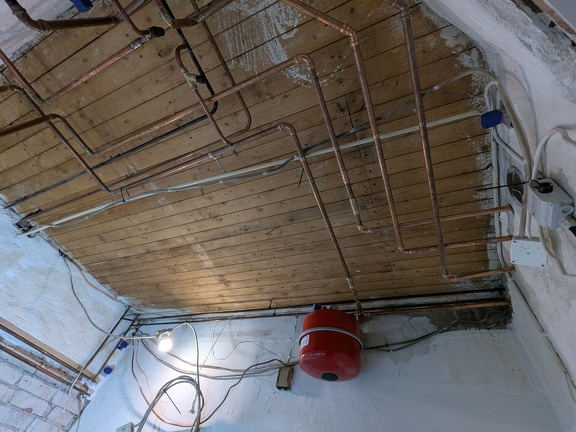
This removal work uncovered the original ceiling and some interesting signs of changes and modifications. I can also feel a draft coming down near the outer wall so some investigation above the ceiling boards will be on next months wishlist. But I need to do the walls first.
Render Removal
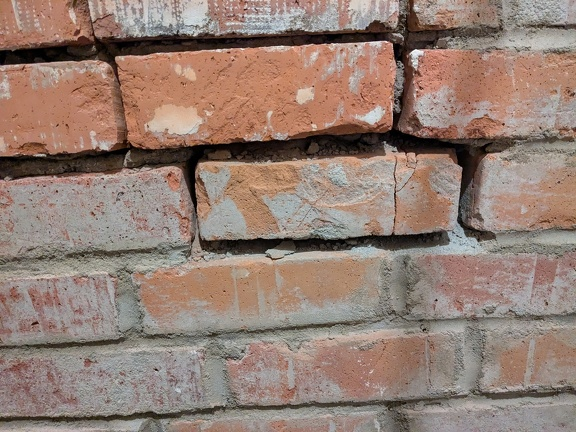
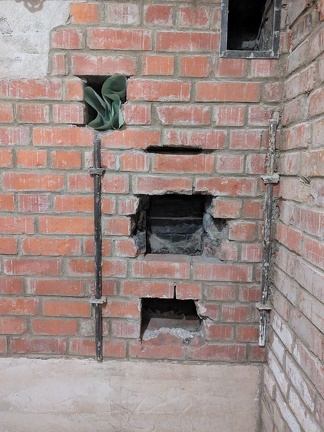
The remaining task was then to remove the old cement render from the brick walls. This was to allow a better finish on the walls and to remove the oil-soaked old cement render from where the old oil-fired heater had been located in the room. With hand tools and an electric hammer drill I cleared all the render off the brickwork on both brick walls. But the centre wall was only part brick. The brick chimney had been built in 1941 and what looked to be a concrete construction block wall had been added later. There were also some odd brick infills in the concrete. I think the constructors didn’t think anyone would see it.
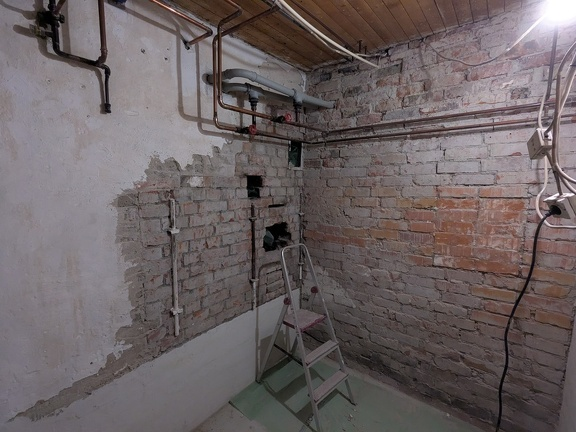
In the photo above the bricked-up hatchway is visible in the wall to the right. It must have been bricked up in more modern times and has been done using a hard modern mortar which is makes things more problematic. More on this below.
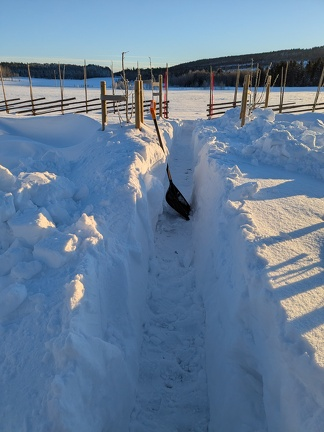
Snow digging
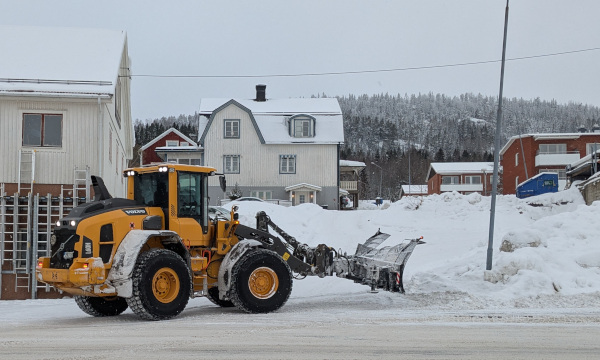
The winds and snow came in bursts. Throughout this month we would see the snowploughs coming down the road in pairs. They make a distinctive noise as the blade has a rubber edge that drags on the road surface. I do like seeing them though.
The snow wasn’t super deep but came in large falls as opposed to small amounts over long periods. Due to the wind there were some snowdrifts in the garden that were chest deep. Generally it was below thigh height however. We cleared routes to the garage, bridge, and greenhouse. We can’t grow anything over winter but we use the greenhouse to store garden supplies and tools winter and sometimes we need to borrow a gardening tool or similar for some unexpected purpose.
Removing the Pointing
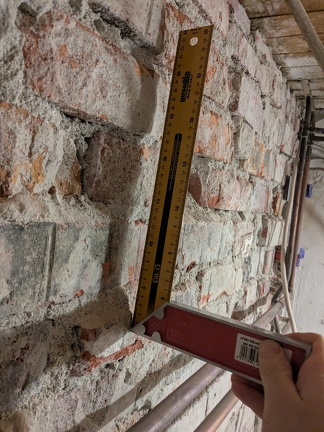
Back to the renovation work, this time to remove the flaky or missing brick pointing and replace it so that the wall will remain strong for years to come. I put a rotating de-mortaring bit in the angle grinder. This bit is intended for taking out mortar between brisks without harming the face of the brick. But is does assume that the mortar between the bricks is softer than the bricks, and that the mortar is an equal thickness, which is how a brick wall should be constructed. You can do the same task with a grinder but this felt a little safer.
It was satisfyingly effective but the only problems were the amount of dust, occasional bricks that were laid too close together, and the hatchway that had been more recently bricked up had been laid with a hard external mortar. This hard mortar meant that when I attempted to use the tool on the old doorway area, the tool wanted to find a path through the softer brick instead, so I’ve left the hatchway alone for now. I want to eventually cut it the door way out. I did narrow problem parts by hand. It took an evening or two, in full protective wear which is awkward to work in.
Repointing
I’ve not repointed a wall before, but I watched a few short videos and read some forum posts and figured I would get stuck in. As soon as I tried to get the first bit of mortar to go into the gap between the bricks, and the mortar went straight on the floor, I knew this was going to be a long task. Repointing two walls in this tiny room took me about 4 days.
Brick walls work best when the mortar is softer than the bricks. This means that if a wall settles, any stress fracture or slight settling movement will happen in the mortar, not the brick itself. Moisture will also escape from the mortar instead of coming through the face of the brick which might otherwise cause spalling of the brick face. Harder mortars are used with modern bricks. Modern bricks tend to be harder than historic ones, having being fired in a kiln to a higher and consistent temperature and so the mortar can be a higher hardness. Also when brickwork is external the mortar needs to be harder to resist weathering. For indoor brickwork and historic houses with softer bricks, a softer mortar is preferable. Apparently the softest mortars also have the ability to re-set over time in the presence of moisture.
I couldn’t get a lime based mortar, which is the softest type and recommended for internal brickwork in historic buildings. I did ask (lime is kalk) but seemed to be causing confusion. There is a lot less historic brickwork in northern Sweden compared to the UK. It’s normally a concrete or stone basement with a wooden building on top. So instead I used the softest normal mortar I could get, intended for indoor use.
I mixed it up and used a pointing trowel and a mortar board to hold a pile or mortar and force it into the joints. I also used a 12mm pointing trowel and a wider “bucket handle” tool to push and shape the mortar between the bricks. I used a plastic pump-handle water sprayer to try and wet the gaps between the bricks so that the dry wall wouldn’t wick all the moisture out of the fresh mortar and so give it problems adhering.
It was quite physically tiring switching between being bent over for the lower sections, mixing up more mortar, and going up on a stepladder for the higher parts. All in a half-mask or full face mask. I needed breaks.
Even with various sweeping and cleaning attempts, the environment was too dusty to work without a facemask and the facemask does start to cut in and leave pressure sores after a couple of hours. I switched between a full face and half mask at intervals to change the contact points.
For the higher parts, I had to go and buy a taller professional stepladder which was an extra expense but hopefully an investment.
Flattening
The chimney brickwork has a concrete wall attached to it, with render over the concrete that is uneven and oil-stained from the old oil burner fumes. I wanted to make the surface of the render flat.
I used a grinder with an aggressive concrete grinding head on it and and full face mask and air filter running. It made so much dust but the wall is now more flat.
The dust and grit gets everywhere, in all your pockets and in the equipment. Perhaps some got into the workings of the cheap angle grinder. The power switch is now stuck such that it is possible to turn the grinder on, but turning it off requires two hands and levering the power switch. It really focuses the mind when you are holding a grinder with a heavy steel grinding head spinning at high speed and need to find a way to turn it off. I’ve tried fixing it without success. The switch was awkward before this work so it’s not a great surprise.
Brick Replacement
There was a broken brick in line with the edge of the old door opening in the wall, which looked like a stress fracture. I couldn’t find a masonry multitool bit in the local hardware shops, and wanted to minimise damage so I stuck a normal metal multitool bit in to remove the softer mortar. This was a bit exciting as it came out the other side (basement workshop) and I had to check nothing important in the workshop was going to get hit.
Replacing the brick was uneventful. After finishing and gaining some confidence, I did start counting how many face-damaged bricks on the wall I might actually care about enough to do the same activity on them. I’m going to hold off until February however as I need to work within my monthly budget and I need some supplies. I also need to leave it for now because I’m busy at my workplace for two weeks now.
Fireplace
I did remove the bricks that had covered up the original, lower, opening to the fireplace in this heating room. Next month I might repair the opening above that was made probably in the 1960’s, for the oil burner that replaced the wood stove. From the Blocket site (similar to ebay) I have a replacement soot-locker door and a flu damper plate coming. Even if these dont fit I can show them to the local metalwork fabricators and get it altered, which will be a lot easier than refitting a new damper-housing and setting it deep into the existing wall.
I removed another 4 buckets of twigs and branches from the air supply vent to the right. I cant see more and there is some airflow. The chimney itself has a noticeable updraft to it, which is good, and the occasional bit of sootfall. The soot clean out pathway on the left remains blocked somewhere further up and I cant yet reach whatever is blocking it but I suspect it is just a big pile of soot which will be cleared the moment a cleaning rod gets to it next month.
Planning to Recoat.
I have to work out what to do next. I’d like to make the room clean and modern whilst keeping the character of the building.
I can probably keep the brickwork as bare-brick on the chimney side of the room. I can re-render the concrete parts of that wall and paint those parts white. I do have to work out how to render the wall in a way that improves the flatness and alignment. Apparently the way is to temporarily affix small batons of wood or aluminium, to serve as a guide for a float. That is going to be tricky to setup, but helpful.
On the adjacent brick wall I can re-point the brickwork and then perhaps lime-render the surface. The surface is wildly erratic however, so it will be tricky to make the surface visually flat.
Supplies
I was a bit worried about the asbestos-removal bill from this month, and the car repaid bill from last month that hasn’t arrived yet, so I only got a small amount of supplies this month.
- The first was a big bag of disposable dust mask prefilters, because there’s so much dust during renovation work and the dust mask has been great. I can get the official ones locally but for about £10 a pair, whereas I can get a bag of 60 for £15 online and then change them each session without breaking the bank.
- The second was a pair of mask filters for paint fumes and similar. This filter sits under the particulate filter and you’re supposed to replace it after 20 hours of use. However I think I’ve had the same pair for a couple of years or more. So at £20 a pair it seems a good idea to replace them.
- I got a pack of vacuum bags for the hoover, because it’s been working overtime through these projects.
- Lastly I got a simple drill-based 9 metre chimney sweep kit so I can clear out the main chimney lines connecting to this room that are blocked up with twigs dropped down the chimney by jackdaws. It’s going to be a lot. I did ask the local chimney sweep company but they haven’t replied, which in Sweden normally means they think I have asked something crazy. So I’ll unblock the chimney and then get it inspected and registered for normal sweeping.
However, the delivery time has updated in the order status screen to mid July, which I think is an Amazon hiccup.
In next months paycheck I’ll likely
- Replace the cheap and broken grinder
- Buy a few bricks to repair the fireplace
- Buy some high temperature refractory mortar to re-coat the inside of the repaired flu
- Buy a small metal or concrete lintel to go above the wall door opening
Last Week
In the last week of January I was watching the budget and had had an intense week at work so I had a recharge weekend without any big plans. We went for coffee and the snow moving vehicles were all out and about, as were the snow mobiles.
Some people from the transport agency also came to visit the house to do a noise assessment related to the nearby road.
We also went for a walk to the docks and out on the frozen sea ice. I did try to source a lintel for the basement work without success. With some mess and effort I could cast a reinforced concrete one myself but I’d looked at a wood or metal one first.
Inspiration
Something I found something unusual and fun to watch this month. There’s an engineer in the US who started making a small food cellar in their basement and then kept digging, With the final area being about 8 metres underground. There is a good summary here: https://youtube.com/shorts/wJepBGOeiRs?si=opsbZW9b9lHOefXy the later videos cover different challenges through the project.

