2024-10 Winter Prep
There was some flooding this month. Significant projects were mouse protection, general winter preparation, and some basement work.
Heavy Rain
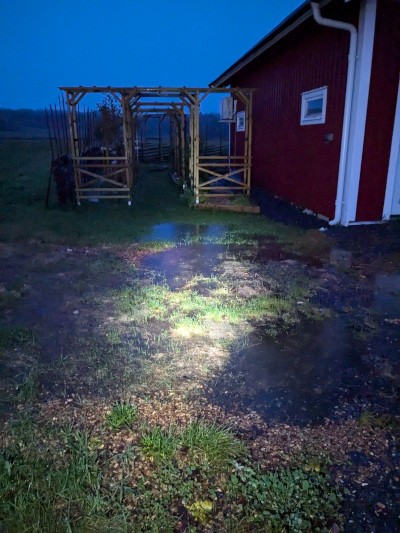
The month started with heavy rain. It kept raining and we told tell from experience that it was unusual. As it got worse we got flood warnings come through on our phones. I went down to the stream and saw the water level wasn’t yet a problem but we knew the water would take 24-36 hours to arrive due to the way the lakes and streams were connected. As the rain continued the water came off the fields and flooded the uphill part of the property near the garage.
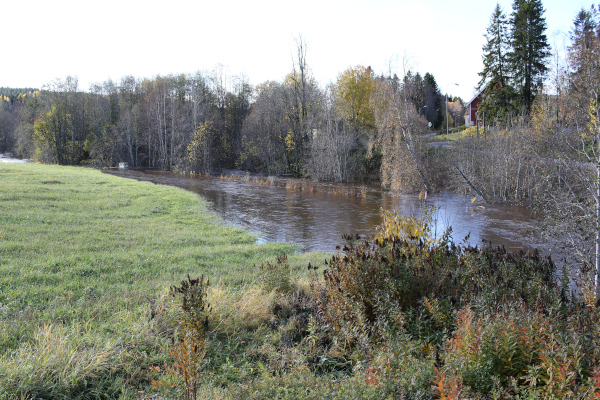
I checked the basement on occasions just in case of the unexpected. I know the previous owned put in a good drainage system around the basement so I wasn’t expecting problems but I checked for any signs of moisture in case. Eventually the water volume in the stream became massive. The stream flooded the nearby field and became a river.
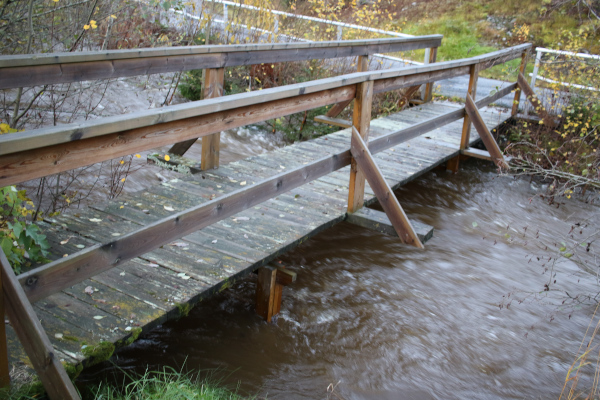
At the bridge the water was right up the bridge supports. We were a little nervous crossing the bridge to get to the shops, because of how much speed and volume was passing just under the bridge.
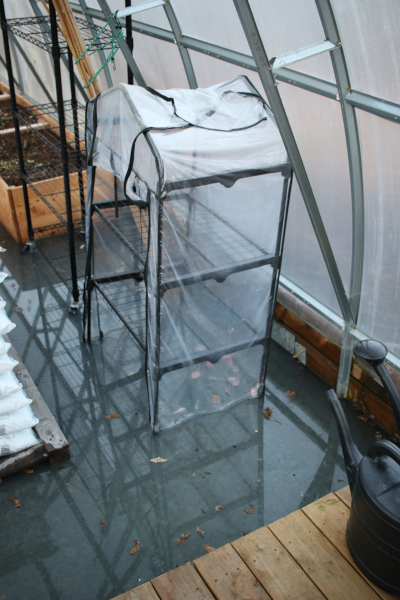
The greenhouse flooded, but it was mostly empty by now anyway, and we didn’t pump it out because we know it should drain within 24 hours. I did use the pump to try and help with a friends basement however.
Mouse War
With the mouse protection incomplete, and temperatures outside dropping, we had the expected influx of mice. By the end of October we had caught 11 mice and one shrew. Usually the live capture trap works great and we take them to the forest. But some mice are cautious can take up to 3-4 days to go in the trap. During that time the mice are exploring the house, inside the walls and ceiling, and scratching or chewing on things – which is potentially a fire risk. It also keeps you awake when something is loudly gnawing on your house.
One major change to last year is that the mice have not reached the attic. Earlier this year I rebuilt a dividing wall on the top floor and sealed the joints around the sewer vent pipe, both at the floor and at the ceiling. I think in hindsight this must have been the mouse-highway to the attic.
I also sealed the sewer pipe where it enters the basement as the gap in the basement ceiling was big enough to see an especially energetic mouse when using a torch. I sealed it using copper mesh and expanding foam, then tided the joint. I’d prefer to have sealed it with intumescent sealant but didn’t have any and it needed doing that evening as the mouse was being ambitious. The pipe has a join as it meets the ceiling which means a standard 110mm intumescent pipe collar wont fit.
There’s one other mouse-route to the top floor but if I seal it the mice wont be able to reach the mouse trap. The best solution will be to finish the external mouse barriers and then keep mouse traps at specific openable locations to the wall and ceiling cavities. It would be great to have no mice next year.
External Mouse Defences
Last month I had added anti-mouse mesh around the bottom of the siding, as the house doesn’t have a “musband” inside the siding. Looking underneath the siding I’d also worked out that it was going to be almost impossible to fit musband. I dug a rough line but then asked a local gardening company for help.They dug the entire trench which was a great help. I put in a small insulation strip and then my partner filled the trench with gravel. The wood edging was a bit rushed but the important thing was that it was completed.
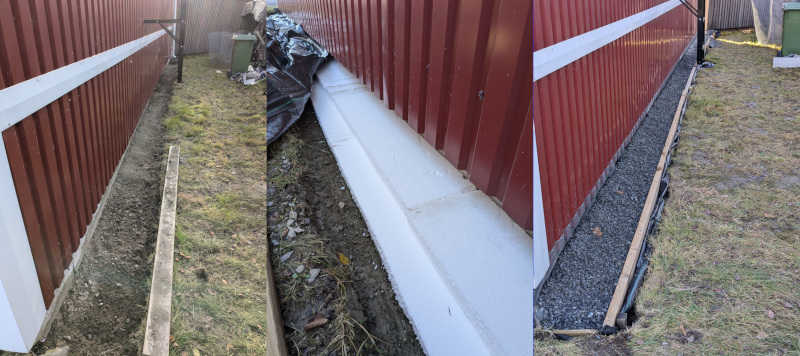
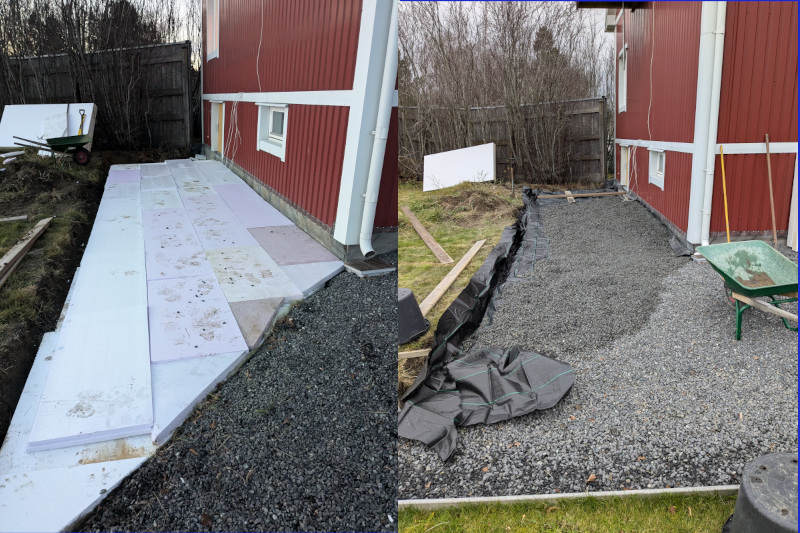
The last side was a lot more work. I got the same gardening company to help dig parts of it when my back was bad. I also ordered the insulation and waited for it to arrived. I used cheap thick insulation below, and then a harder layer on top, with a ground fabric over the top. If I had more time and resources I would have paid for a company to dig and put insulation vertically around the basement walls but it would be lot of work and money with no time before winter. An insulation apron is a lot cheaper. I was able to lay the insulation at the end of the month and my partner and I put gravel down. There is some tiding up to do around the edges but most of the work was done.
Exam Pass
I got news that I had passed the written exam I took last month. I also got a goodwill exam fee refund for the exam that had been cancelled, which was really welcome in this pre-winter crunch period when there are lots of projects.
Outdoor Preparation
I’ve put the plastic red poles in the ground, which will help indicate where the boundaries are for the big snow moving vehicles to work around. Ideally I would put some metal tube in the ground that the plastic poles would then sit into. That way they wont get blown over when the ground is soft. It’s too late to put the poles in the ground when the ground freezes. Once the deep snow arrives it’s hard to find ditch edges and similar that might otherwise be what you are trying to mark.
We put all the construction materials and other parts from the garden into the greenhouse so they aren’t hazards to be blown in the storms or buried under snow.
I took the snowblunger (snowthrower/snowblower) in to the local service centre to get it looked over before winter as it had some damage. I also took the car for a service.
Heating System
The weather was mild for October but it is important to be ready for winter so there was some work on the heating system to finish. I had the plumber over to fit one radiator which had been removed during a room decoration, and had a anti-bump valve fitted by the washing machine. I was really glad to get this done but was surprised when the water ran for all sinks then ran red with rust.

Opening and closing the water valves when refilling the heating system had triggered a pressure wave in the main plumbing system. Steel galvanised pipes build up a rust sludge inside. The first year we moved in we had replaced all the exposed ancient galvanised steel water pipes but there would still be some short lengths near the various taps. As a result the pressure change knocked loose the rust sludge in these final sections.
We had to run the water for about 20 minutes to clear out the rust, but this will be quite tricky to prevent from happening again. Reaching the remaining pipes would be destructive in terms of pulling out wall and ceiling sections, which I’d rather not do until there is a more serious need.
Basement Work
When the November storms come, it wont be good weather for outdoor activities and the garden will be unusable. So I took a look a the basement in preparation for more indoor work.
There was construction timber that I had delivered for some construction work which took up a lot of space. I hadn’t been successful in getting a carpenter to come and do the work. It involved replacing some uprights in an existing open wall structure with new timber. The old wall had been constructed from scrap timber that had pre-construction burn damage over it but was just used to hide an old heating oil tank originally.
I decided I would cut the timber to the approximate needed length so that it took up less space. The next day I figured I would try replacing one just upright. It was tricky because the wall I needed to keep had been screwed in from the other side. But it went ok and with more confidence I ended up replacing 3 of the 5 uprights.
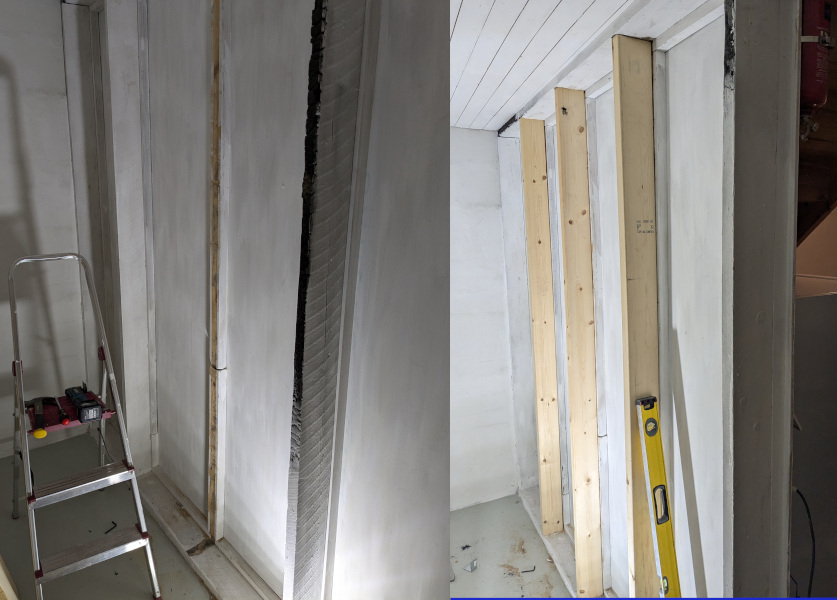
The next day I replaced the 4th and removed the 5th. The last upright had been too short to quite touch the top-plate so I wasn’t worried about it being load bearing. I took it off and exposed a cavity related to an old window opening. I cleaned the exposed wall surface and then used a hard repair cement to repair and smooth the surface. I then put noggins between the uprights to stop them bending, but also to create some potential shelves. Overall the work was a bit tricky because the uprights had to match the batten uprights of the existing wall, which had slightly different spacings. So the noggins were different lengths.
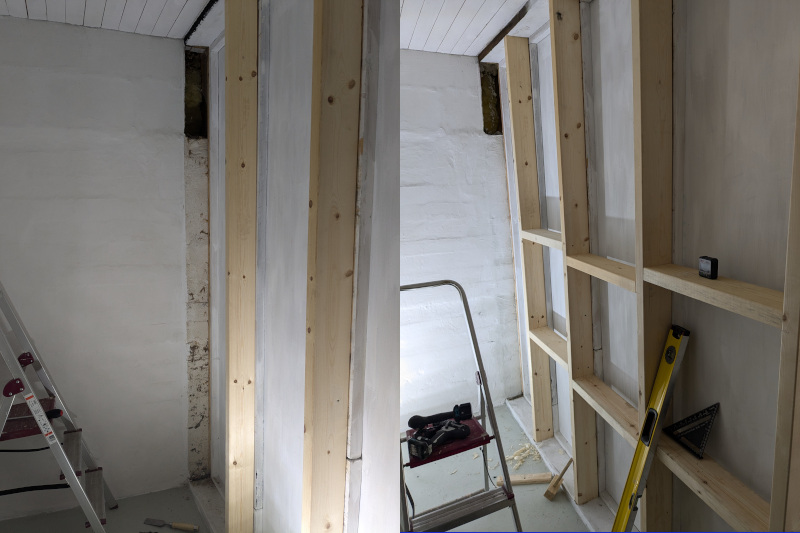
The last bit of burnt-wood was on the top plate. I used a wide chisel to remove the charcoal which worked fine. I inspected inside the cavity which seemed sealed with no mouse droppings. This was probably the original window opening which had been shortened. To the right was a newer window.
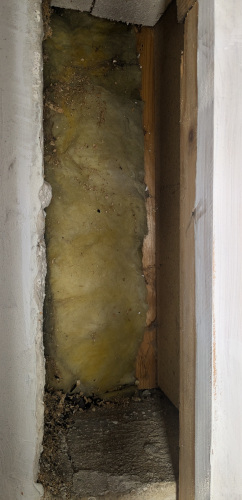
For insulation, I filled it with stonewool which is good for old houses where the construction might be drying to the inside or outside through the insulation. Next month I’ll seal the hole; I’m just having a think about what method to use. I might cut a paving slab or cast a small concrete slab to cement in. Or I might find some cement board offcut form somewhere.

